Showing posts with label diy chalk paint. Show all posts

Wednesday, April 17, 2013

The Little White Stand

My intention was to take the drawers out of these stands, paint them, decorate them, then use them for display.
But after the drawers were painted and I saw how pretty they were, I decided to go ahead and update the stands as well.  

Before I show you the "before" and "during" I will show you this picture of the "after".

I will say this was a really fun project because the start of this project was really bad and I knew it could be really good.

These stands were originally part of an Art Deco vanity, most likely with a low shelf and a large round mirror in between them.

These were right inside my storage shed.
I can't hardly get in it any more, there is just too much "stuff".
So instead of going out and spending money on more "stuff" I plan to work on some of the "stuff" I already have.


Here you can see where the stands were once connected to the vanity.
Also, one caster is missing.
I see wood putty. I think I started working on these a long time ago.
I probably decided they needed too much work and gave up on them.


Before I painted the drawers, I removed the felt liner that was in them.
Then I cleaned and sanded them.
The veneer was bad on the fronts so I removed it.
Then more sanding, then paint.
I will have to fill a few holes in the drawer fronts with wood putty.


These are the original lion's head drawer pulls.
I have always loved these but I've decided I might not even use them.
I might go to Hobby Lobby and buy some real pretty ones.


At the bottom of this side the veneer was wrinkled.
So I glued it and added weights to hold it down, then let it dry overnight.
The plastic bag keeps the glue from sticking to the weights.
When I removed the weights I noticed the veneer was still a little bit puckered so I laid a towel along the edge and ironed it.
This melted the glue and made the veneer lay flat.
Even though I am going for a shabby chic look, I still want it to be the best that I can make it.


The veneer on the top has to completely come off.
It is really bad.


This is an easy process with our Wagner heat gun.
After I heat up the gun, I just hold the nozzle close to the veneer and melt the glue underneath.
Then, while it is still hot, I lift it off with a putty knife.


I borrowed Mr. Shabby for the photo shoot.


At this point we really had to make sure we were doing it right because our supervisor, Lucy, was checking our progress.


After the veneer was removed, I had to fill some places with wood putty.
I let it dry overnight then sanded the entire top smooth.

Remember now, the finished piece will be pretty.


It turned out pretty good.
I would be lost without my little Makita hand sander.
Next, I will prime it.


On the side we added a thin strip of wood then filled with wood putty.
The thin strip of wood was actually a paint stirrer cut to fit. It was the perfect thickness that we needed.
Then more wood putty, more dry time, then more sanding.
Whew! I see why I gave up on this piece before.


Found one!!
I got lucky and found an old caster. It is even scruffy and matches perfectly.


At this point, it is pretty much all repaired and primed.
Now, I'm going to tell you something that I shouldn't admit.
I have a large, sturdy work bench that rolls around, where ever I want it to go.
So why am I working on this twittered up little table?
Because my dream work bench is loaded down with "stuff". hehe


I probably shouldn't have painted the inside of the drawers pink.
It sort of narrows the buying field.
Oh well.
I found a shade of pink that I really love.
It looks like raspberry.


Here it is after I painted it with DIY chalk paint.
I just took some of the satin latex paint and added about 1/3 as much Plaster of Paris.
I'm not sure what my next step will be.
I might add a brown glaze and I might distress it.
I haven't made up my mind yet.
But I'm sure I will stick with the Heirloom white for the outside and the raspberry pink on the inside of the drawers.


I am only partly finished with the first stand.
If I add glaze or distress it I will wait until the second one is done then finish both of them at the same time.

The nearest Hobby Lobby is about an hour away from where I live so I will wait on the knobs for now.
The ones shown in the photos are borrowed.


At this point, I am happy with the progress.
 

Linking to:


Friday, January 11, 2013

1930s Cabinet Reveal

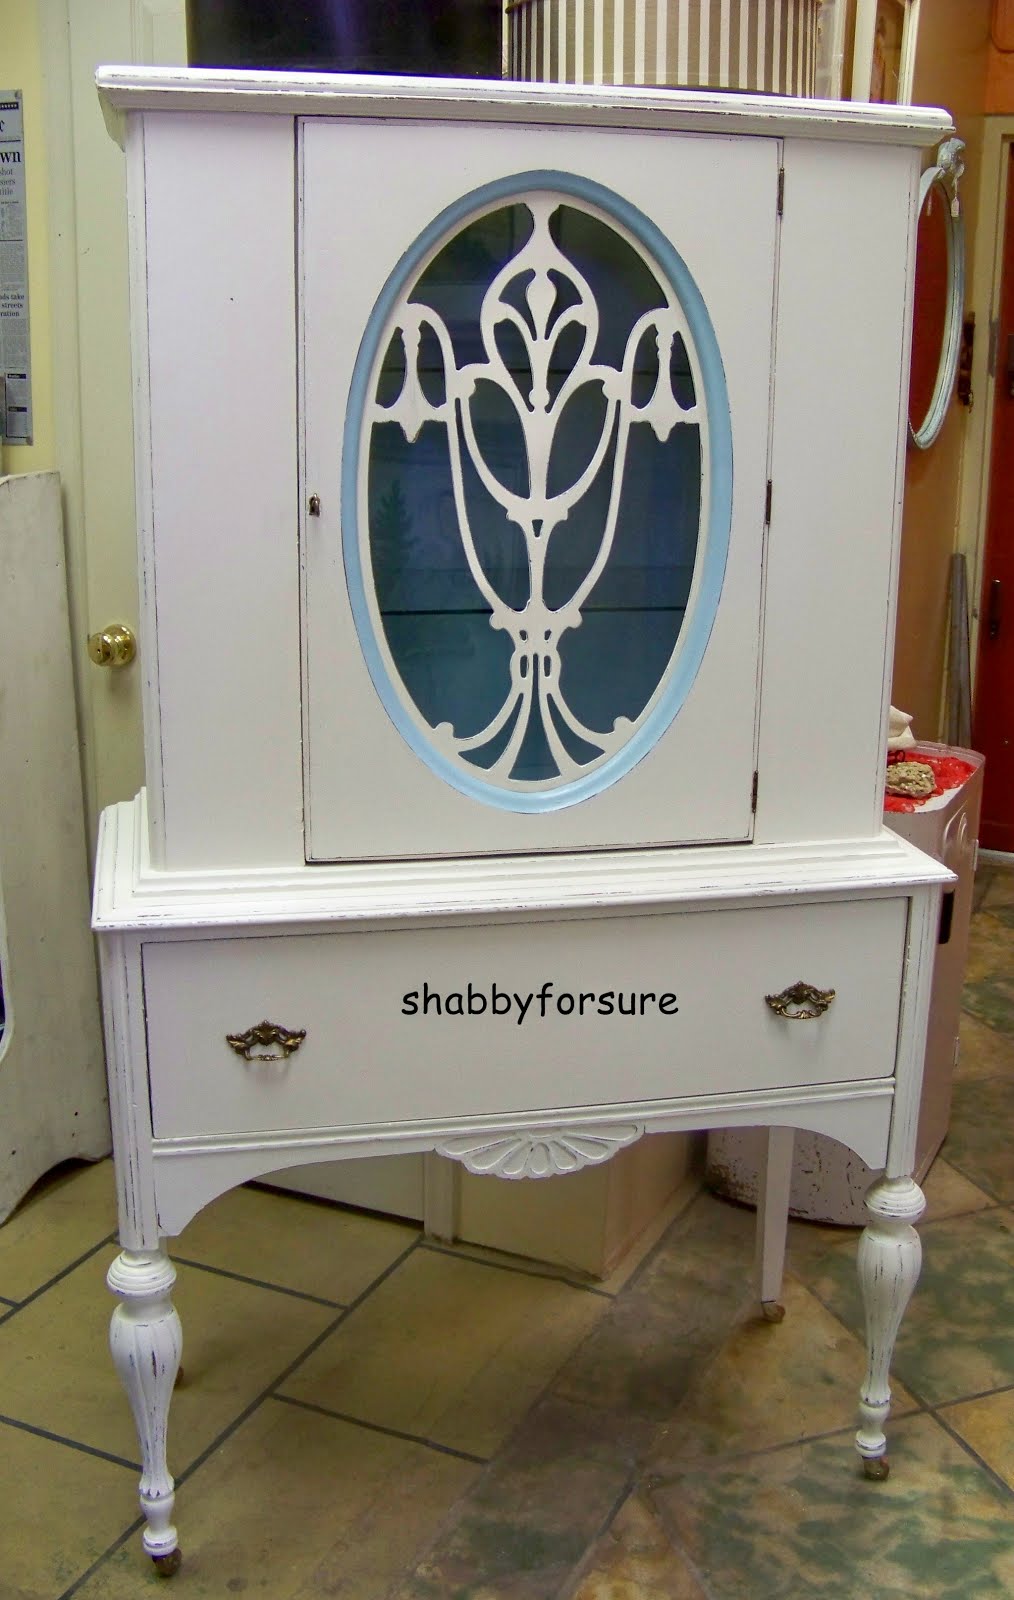
After working on this cabinet for about 2 weeks, then waiting for hardware that was back ordered, I can finally say I'm finished with this project.


After I bought this cabinet, I thought about what to do with it for about 2 weeks.
I wasn't sure if I should paint it or not.
Then, when I did decide to paint it, the color combinations were endless.

In this "before" picture you can see a part of the beautiful fretwork was missing.
Also, there were no castors.
What you can't see is how dirty it was and it was really stinky.

I started this project by taking it apart and giving it a quick sanding, using my Makita hand sander.
I removed the back so I could work on the inside more easily.
The two wooden shelves were alright but I decided to add glass shelves at a cost of about $36.00.
Also, I did away with the pediment, which was not original to the piece.

I primed the entire piece using DIY chalk paint.
I mixed some blue "oops" latex paint with Kilz 2, then added a handful of Plaster of Paris.
I got some of the mixture on my skin and could not wash it off with soap and water.

When I finished all the painting, I gave it a light distressing.
Then I waxed it using SC Johnson Paste Wax.

This is what I call a light distressing.
I love how the blue primer peeps through.

I love, love the fretwork.

Mr. Shabby repaired the fretwork.

This is the fretwork all repaired and primed.

This is a close up of the inside.
Very dirty, very stinky.

What a difference paint can make.
Not only does it make it beautiful, it makes it a lot cleaner and improves the smell.
And I'm glad I sprung for the glass shelves.

I bought a new lock with an extra key for about $30.00.
Then I went to Lowe's and bought a cabinet light that cost around $10.00.


The reproduction, wooden castors make all the difference.
Now I can move it easily.
Before, it was heavy and awkward and it took two people.

On the outside of the cabineet I used latex Heirloom white.
The pop of color on the inside of the cabinet and drawer is Bird song Blue.
I also painted all the hardware with Rub 'n Buff Grecian Gold, purchased at Michaels. 

I painted the beveled edge on the door the same shade of Bird Song Blue that I used on the inside, but somehow it looks a lot lighter.
I couldn't be happier with the results.
Linking to:
Furniture Feature Friday
Shabbilicious Friday
Show And Tell Friday
Be Inspired Friday
Fabulously Creative Friday
Feathered Nest Friday
Frugal Friday
Blissful Whites Wednesday

Related Posts Plugin for WordPress, Blogger...