Showing posts with label fretwork. Show all posts

Friday, January 11, 2013

1930s Cabinet Reveal

After working on this cabinet for about 2 weeks, then waiting for hardware that was back ordered, I can finally say I'm finished with this project.
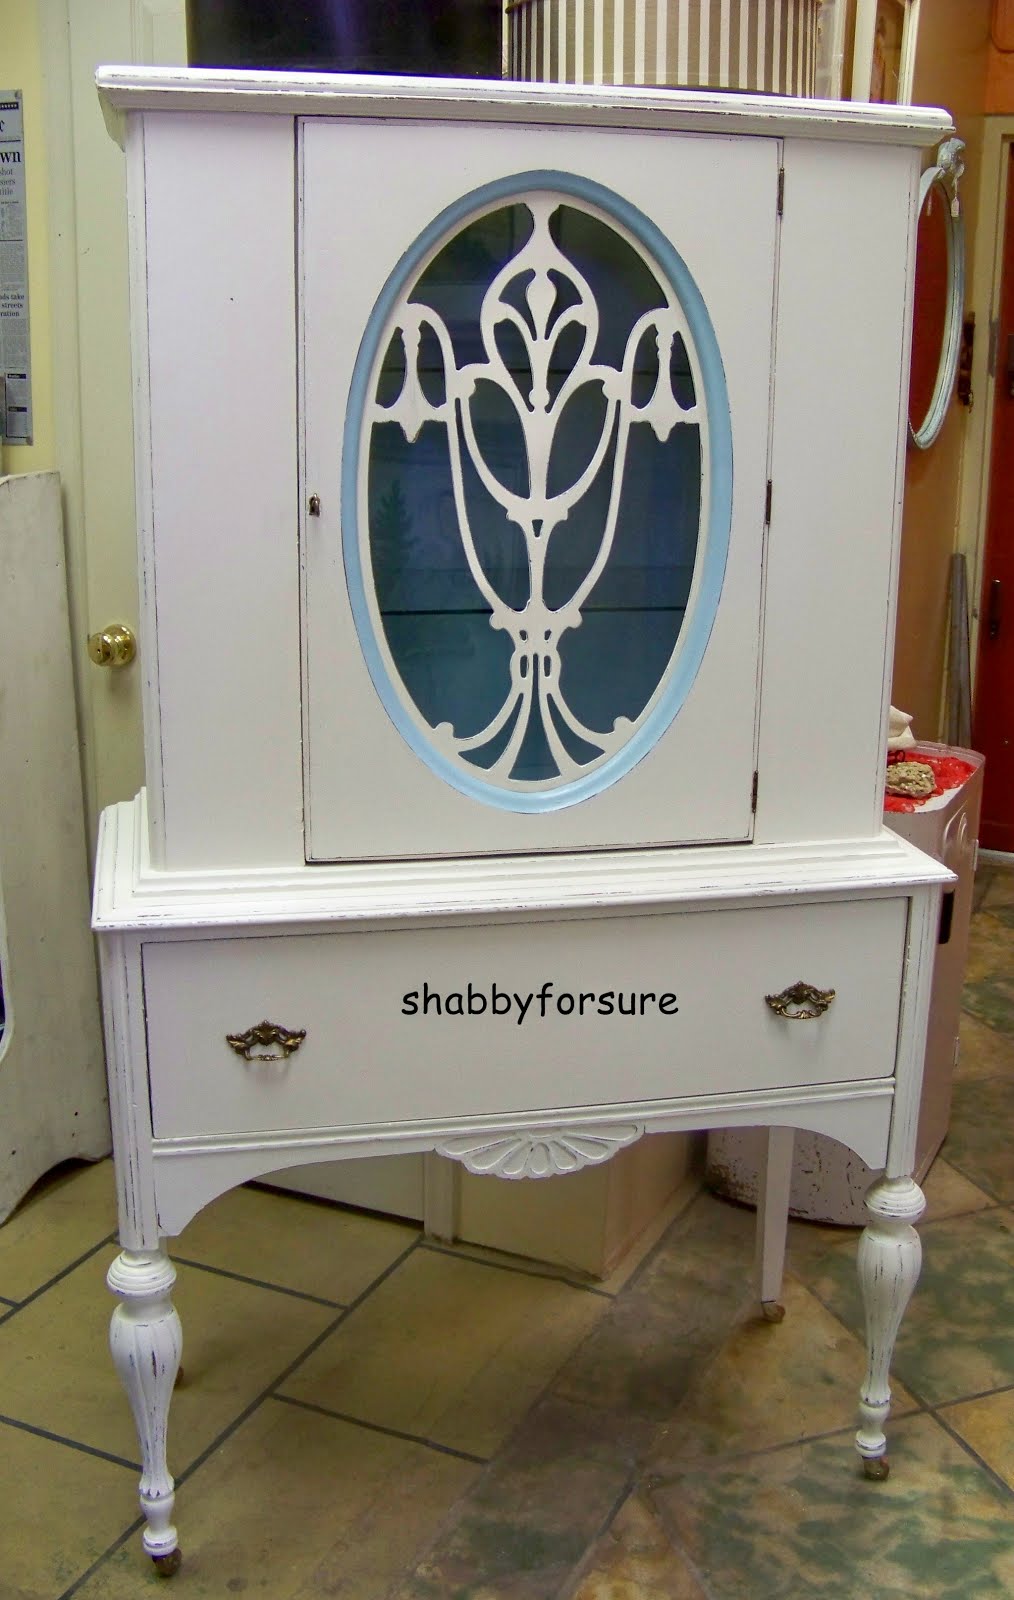
                                             

After I bought this cabinet, I thought about what to do with it for about 2 weeks.
I wasn't sure if I should paint it or not.
Then, when I did decide to paint it, the color combinations were endless.

In this "before" picture you can see a part of the beautiful fretwork was missing.
Also, there were no castors.
What you can't see is how dirty it was and it was really stinky.

I started this project by taking it apart and giving it a quick sanding, using my Makita hand sander.
I removed the back so I could work on the inside more easily.
The two wooden shelves were alright but I decided to add glass shelves at a cost of about $36.00.
Also, I did away with the pediment, which was not original to the piece.

I primed the entire piece using DIY chalk paint.
I mixed some blue "oops" latex paint with Kilz 2, then added a handful of Plaster of Paris.
I got some of the mixture on my skin and could not wash it off with soap and water.

When I finished all the painting, I gave it a light distressing.
Then I waxed it using SC Johnson Paste Wax.

This is what I call a light distressing.
I love how the blue primer peeps through.

I love, love the fretwork.

Mr. Shabby repaired the fretwork.

This is the fretwork all repaired and primed.

This is a close up of the inside.
Very dirty, very stinky.

What a difference paint can make.
Not only does it make it beautiful, it makes it a lot cleaner and improves the smell.
And I'm glad I sprung for the glass shelves.

I bought a new lock with an extra key for about $30.00.
Then I went to Lowe's and bought a cabinet light that cost around $10.00.


The reproduction, wooden castors make all the difference.
Now I can move it easily.
Before, it was heavy and awkward and it took two people.

On the outside of the cabineet I used latex Heirloom white.
The pop of color on the inside of the cabinet and drawer is Bird song Blue.
I also painted all the hardware with Rub 'n Buff Grecian Gold, purchased at Michaels. 

I painted the beveled edge on the door the same shade of Bird Song Blue that I used on the inside, but somehow it looks a lot lighter.
I couldn't be happier with the results.
Linking to:
Furniture Feature Friday
Shabbilicious Friday
Show And Tell Friday
Be Inspired Friday
Fabulously Creative Friday
Feathered Nest Friday
Frugal Friday
Blissful Whites Wednesday

Saturday, December 1, 2012

1930s China Cabinet


Those of you who follow me know I love to paint furniture, but I don't usually paint good pieces. I like to find pieces that are really bad, then transform them into beautiful, useful pieces..
When I bought this china cabinet a couple of weeks ago it was tied to the back of a pickup truck and the glass had slid part way out making it look like it was broken (turns out it wasn't).
 It was filthy and stinky, too.
But after I got it in my shop and took a closer look at it, it was in better shape than I first thought.
The major things wrong with this are: The fretwork that is so beautiful is partly missing and it looks like a can of stain was sitting on the top and dripped down one side on the front. Plus it looks like the pediment has been replaced at some point.
So, all things considered, I consider this piece borderline. If I clean it up and repair it, the value would be about the same as if it were painted.
After thinking about it for two weeks I've decided I'm going to paint it.

After doing a little research, I learned this piece was produced by the Reaser Furniture Co., in Gettysbury, Pa. sometime in the 1930s.


The fretwork is really beautiful.


Also, when I decide on a color, I will paint the inside of the cabinet and the inside of the very large drawer the same color.
The beveled rim around the glass door would also be painted the same as the inside of the cabinet.


At this stage I also plan to eliminate the pediment.
It adds nothing to the piece.


Here you can better see the streaks running down the front.
My plan is to replace the top shelf with a glass shelf (maybe both shelves).
I would like to add a light.
I haven't decided what to do with the hardware yet.
I think I will probably paint the outside Heirloom white with a Burnt Umber glaze.
Then of course, I would distress it giving it a shabby chicc look.
I probably won't get started on this 'till next week so any input you have would be greatly appreciated.
Thanks for looking...Connie


Related Posts Plugin for WordPress, Blogger...