Sunday, April 14, 2013

Fancy Flea Spring 2013

A week has passed since I set up for the 4th time at the Fancy Flea in Lakeland, Florida.
This is a popular home and garden market hosted twice a year by Lori Powell.
Lori started this event just a few short years ago with a vision and 12 vendors.
She now fills the streets with 300 booths and throngs of shoppers.

This flea market has been voted one of the top ten flea markets in the country.
People are already looking forward to the next one, which will be held in Nov.


This was my friend Paula's booth.
I love having her set up right next to me.
We started out sharing 3 booths, now we have 4.


This is the front of Paula's booth.
She's getting pretty "Fancy". hehe


I really love this piece. I wonder if it sold?

After I set up my booth I took a walk and snapped some pictures.
Most of my pictures were taken around 7:30 a.m., so not everybody was fully set up.


Look at these beautiful dresses.


Such talent.


Love It all.


I might have to borrow this idea for a banner.


Beautiful aprons.


Love the pink.


Oh my, how did this picture of me get in here? hehe


These are my neighbors who helped me. They were a big help. Still smiling after a hard day at work.
Thanks Sherry. Thanks Noel.


This is one of the pieces I took.
It sold early.


This is another piece I sold.
Sometimes it is hard to let go of things, but I can't keep everything.

All in all, it was a really good day.
It was a lot of work but I've been making some new friends, and it was a lot of fun.


This is my current project. I have had these little night stands in storage for so long I forgot where I got them.
I started out thinking I would do something with just the drawers but I've decided I should bite the bullet and do the stands as well.
Lots of work but oh well.


I found a shade of pink I really like, looks like raspberry.
I like a pop of color on the insides of drawers.
These should keep me busy for awhile.


Thursday, April 11, 2013

Shabby Cottage Tray

Mr. Shabby and I bought a desk that needed a little bit of work and a lot of cleaning up.
 Inside one of the drawers was this cutlery tray.
Someone must have thought it went with the desk, but it didn't.
As with most things I buy, it was pretty sad and dirty,
almost a throw-a-way.
I decided to rescue the tray with a little TLC and some imagination.

This is what it looks like after very little work.
This is one of the quickest, easiest projects I have worked on in a long time.
The paint color I chose actually matches better than the pictures show.


This is a "before" picture.
It is really in very good condition except for the stains and years of dirt and grime.


There's no way I would have used this without a good cleaning and scrubbing.


The first thing I did was take it apart.
Then I gave it a quick sanding, using my Makita hand sander.
The dividers just slid out and the back was just attached with tiny nails.


I just happened to have some really cute shelf liner, which was very easy to apply while it was all taken apart.
The pattern is called Garden Grove.
It is very colorful and quite versatile.
This would be handy in a craft room to hold supplies, etc.


I love how it turned out.
It is now clean, pretty, and useful.
Plus, it is rather large, about 14" by 14".


I only used one coat of satin latex paint.
This would fit perfectly in a shabby chic or cottage décor.


I painted the backside, too.
You never know when someone is going to turn it over and inspect it.
This project cost very little, almost nothing.
I had purchased the shelf liner at a garage sale for fifty cents and I used very little paint.
Linking to:


Tuesday, March 19, 2013

Industrial Chic Cabinet

Sorry for not posting lately.
First, I had serious computer problems. And lately I have been busy getting things ready to take to the Fancy Flea on April 6th, 2013.
This will be the 4th time I have set up at the Fancy Flea, a vintage home and garden market, held twice a year in the beautiful, historic city of Lakeland, Florida.
This has been voted one of the top 10 flea markets in the country.
I have kind of learned from experience what to take and what not to take.
When I found this industrial cabinet a couple of weeks ago, I knew it was a winner.

After I bought this cabinet, I carried it around in my car for a few days.
It is made out of steel and is very heavy.
I had to figure out exactly what I was going to do with it.


.


This is really a wall cabinet, but because I knew I would be selling it at a street fair, I had Mr. Shabby Mr. Crabby put castors on it.
The castors cost around $9.00 at Lowe's.
This will make it easier to move around and the castors can be easily removed if the new owner wants to hang it on a wall.


Believe it or not, I spent a lot of time on this cabinet.
First, I cleaned it.
One of the doors had a broken glass. The cost to replace that was around $12.00.
The wooden shelves fit too tight so we had to trim them down just a bit.
The wooden shelves had never been painted, so I painted them Heirloom white, then wiped on a glaze.
Then I distressed them.
I didn't want them to look new.
Then I waxed the outside.


The rusty, crusty patina on this cabinet is wonderful.
Mr. Shabby still wonders why it didn't go in a dumpster somewhere.
Can you believe that???


Very industrial.
Very chic.
Very fabulous.


I also found this wonderful little wall shelf and gave it an updated look.


On this piece, I just painted it using Heirloom white, then wiped it with a brown glaze, then I distressed it a little.
I really love this piece.
This will be going to the Fancy Flea, too.
 
 
Linking to:
Wow Us Wednesdays
 
and

and
Rooted In Thyme
and

Friday, January 11, 2013

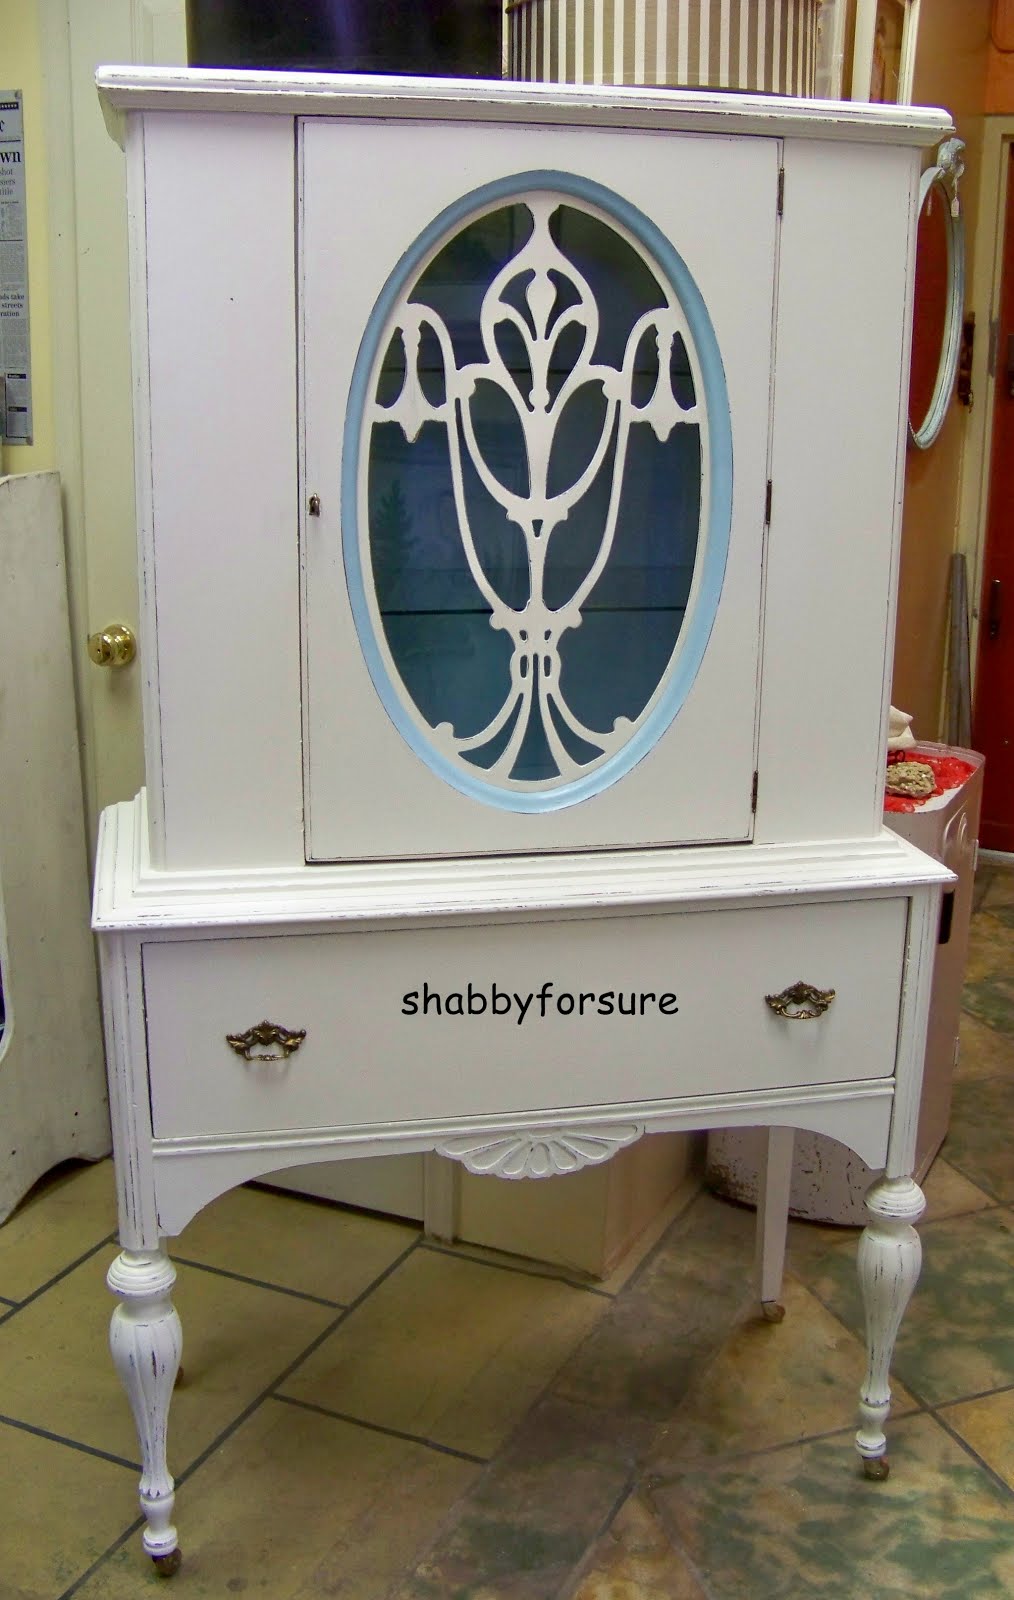
1930s Cabinet Reveal

After working on this cabinet for about 2 weeks, then waiting for hardware that was back ordered, I can finally say I'm finished with this project.


After I bought this cabinet, I thought about what to do with it for about 2 weeks.
I wasn't sure if I should paint it or not.
Then, when I did decide to paint it, the color combinations were endless.

In this "before" picture you can see a part of the beautiful fretwork was missing.
Also, there were no castors.
What you can't see is how dirty it was and it was really stinky.

I started this project by taking it apart and giving it a quick sanding, using my Makita hand sander.
I removed the back so I could work on the inside more easily.
The two wooden shelves were alright but I decided to add glass shelves at a cost of about $36.00.
Also, I did away with the pediment, which was not original to the piece.

I primed the entire piece using DIY chalk paint.
I mixed some blue "oops" latex paint with Kilz 2, then added a handful of Plaster of Paris.
I got some of the mixture on my skin and could not wash it off with soap and water.

When I finished all the painting, I gave it a light distressing.
Then I waxed it using SC Johnson Paste Wax.

This is what I call a light distressing.
I love how the blue primer peeps through.

I love, love the fretwork.

Mr. Shabby repaired the fretwork.

This is the fretwork all repaired and primed.

This is a close up of the inside.
Very dirty, very stinky.

What a difference paint can make.
Not only does it make it beautiful, it makes it a lot cleaner and improves the smell.
And I'm glad I sprung for the glass shelves.

I bought a new lock with an extra key for about $30.00.
Then I went to Lowe's and bought a cabinet light that cost around $10.00.


The reproduction, wooden castors make all the difference.
Now I can move it easily.
Before, it was heavy and awkward and it took two people.

On the outside of the cabineet I used latex Heirloom white.
The pop of color on the inside of the cabinet and drawer is Bird song Blue.
I also painted all the hardware with Rub 'n Buff Grecian Gold, purchased at Michaels. 

I painted the beveled edge on the door the same shade of Bird Song Blue that I used on the inside, but somehow it looks a lot lighter.
I couldn't be happier with the results.
Linking to:
Furniture Feature Friday
Shabbilicious Friday
Show And Tell Friday
Be Inspired Friday
Fabulously Creative Friday
Feathered Nest Friday
Frugal Friday
Blissful Whites Wednesday

Related Posts Plugin for WordPress, Blogger...