Saturday, June 30, 2012

My $2.00 Ugly Chair

Last week I was reading about transfer methods at thegraphicsfairy  
Karen has a wonderful blog and had written a post titled: "12 Easy Image Transfer Methods For DIY Projects".
The method that seemed the easiest to me was #7, The Mod Podge Method.
Then one night, by chance, I found a lovely blog: "With A Dash Of Color" and I fell in love with her  Decoupaged French Pots  . They were totally awesome. Poppy showed step by step how she made hers and she made it look so easy I thought I would give it a try.
My first project is the two terra cotta flower pots shown below. I used a French Printable Transfer from The Graphics Fairy. She offers so many wonderful transfers it was hard to choose one.
After I found out how easy it was, I looked for another project.
                                                                               

So I found this little child's chair. I normally wouldn't have bought it because it was a little bit ugly but the size and scale is pretty much what I wanted. And, it was just $2.00


Nobody had ever put a finish on it so there wasn't a lot of prep.


I started by applying two coats of white diy chalk paint.


I decided it was too white so I diluted some Robin's Egg Blue acrylic paint with water and whiteblue washed the little chair. Working quickly, before the paint had a chance to dry, I immediatly wiped off all the watered down paint. I normaly do this outdoors but it has been so hot lately I just set it in the sink.
This sink is in my workshop so I can make a bigger mess than I would at home.
 
 
The color now is still white with just a tinge of blue. At this point I distressed the chair to give it some character.
I printed out two transfers, again from The Graphics Fairy, and trimmed around them to make them easier to work with.
The smaller one will go on the back.
I marked the center so I would know where to place the transfer.
Using my finger I applied Mod Podge to the front side, the side with the graphics, then placed it where I wanted it.
I used my Kodak printer using regular black ink and regular copy paper.


After I let it dry overnight it was time to do the transfer.
First, I laid the chair flat, for easy access. Then I dabbed the transfer with a soppy rag and got it good and wet. Then, starting in the middle and using my finger, I gently started peeling away the paper, a little at a time.
It's kind of like peeling away an onion skin when you're peeling onions.
I kept adding water because it kept drying out.

Here you can see the transfer begin to appear as the layer of paper is removed.


Here you can see the paper that has been peeled away.


When I thought I was about done I went back around the edges adding a little more water and I added more pressure to soften the line of decarmation.
I believe the name of this transfer is Pretty Crown.
After everything was good and dry I added a coat of wipe on Poly.


Me, kitty and "the gang" are excited and we're looking forward to our next Mod Podge Transfer.


This is the view from the back.
I think I should have placed the transfer a little higher.
 

This is the finished project and I couldn't be happier with the way it turned out.
Learning how to do a Mod Podge Transfer was a new experience for me and I can't believe how easy it was to do.
Thank you Poppy!

linking up with:


SABlink-party


<br><br><br><b>Join us every Friday...</b>


Sunday, June 24, 2012

Plaster Of Paris

I grew up living in an old house and my mom always used Plaster of Paris to patch holes in the walls.
When I use Plaster of Paris today, it is to mix with paint to make chalk paint.
My formula for chalk paint is 2/3 latex paint and 1/3 Plaster of Paris with enough water to get the consistency I want. I love chalk paint because it is easy to mix, you can mix any color you want, you don't have to pre sand and the results are fantastic.
Yesterday at a garage sale I bought some that came in an old green glass jar. The jar is wonderful and still has a lot of plaster in it.

It looked more like a jar of medicine so I was talking to my husband about it this morning and he reminded me they used to use it to make casts for broken bones.
Then in the 1970s when this type of cast making began to wane, they started making orthopedic casts out of synthetic materials.


On the back of the jar are  instructions on how to: Make splints, make cast impressions, and how to mix and use as cement.


I love the old jar and even think the lid is pretty.


At the same sale I also bought four other old bottles, but the Plaster of Paris is by far my favorite.


One of the other old bottles held Moone's Emerald Oil, one held Soda Mint Tablets.


Occasionaly, but not very often, I find some wonderful old bottles like these. I just put them in my antique apothecary cabinet along with apothecary items I collect.
One day I will write a post and show you my apothecary collection.


In the background you can see a container of Plaster of Paris we have in our workshop. It comes in a very boring cardboard box.
 Plaster of Paris is the preferred product used by professionals, artists and hobbyists.
I did a little research and was surprised to learn how long this product has been around and how may things it can be used for.
To learn the history of Plaster of Paris  click here
 
I am linking up with:


Thursday, June 21, 2012

Love Letters In The Sand

Not long ago, at an outdoor flea market, I found this large stack of old love letters, most of them dating back to the 1940's.
I was happy to find them, of course, but what grabbed my attention was the seller.
He had a very unique way of displaying his treasures.

Most of us bloggers really believe in staging.
Some of you take pictures as good as any you will ever see in a magazine.


And I've always believed staging helps to sell your product.


This letter was "thrown" in with the rest of them. hee hee


This is where I found my pile of love letters.
They were "thrown"in the sand along with all of the other stuff he had for sale.


He just threw stuff out of his car onto the ground and people were shopping like crazy.
I had to stand in line to even ask for a price.


Some of the stuff was junk but a lot of it was pretty good.
He was busy answering questions, throwing out more stuff, taking money, etc.
Then I had to stand in line again to pay for stuff.


In all my years of shopping at flea markets I have never seen anything like this.
He was for sure the crowd favorite.
Even with all the tromping I didn't see anything get broken.


It didn't take long for him to sell all of his stuff.
After I paid for my love letters, I just stood there and watched the crowd.
It was amazing, I must say.
 
linking to these parties:
 
Thrifty Things Friday
 
 
The Thrifty Groove
 
My Romantic Home
  
<br><br><br><b>Join us every Friday...</b>


Tuesday, June 19, 2012

OMG! Stove Pipe

I rarely get up early enough to go to garage sales so when I stopped at one last Saturday at 9:30 a.m. I didn't think there was much hope of finding anything. But my heart went pitty-pat when I found this wonderful section of old stove pipe.
When I showed a picture of it to my friend she thought it might be a muffler.


My first thought was OMG! how is it that this is still here?


Then I thought "instant garden art".
Perfect in every way: rusty, crusty...


Check out the gorgeous vent.
What could a steampunk artist do with this?


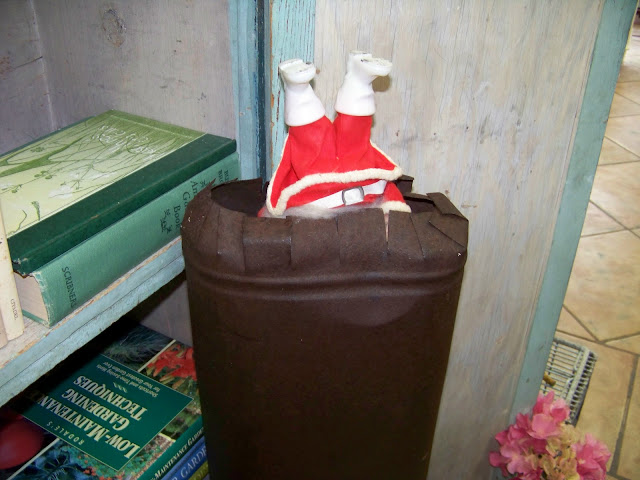
Now I'm thinking this could be a unique Christmas decoration.


Santa is coming to see me. See??


This is my diva friend who thought it might be a muffler.
Can you picture her crawling under a car to see what a muffler looks like??? hee hee


linking to:
My Uncommon Slice of Suburbia

SouthernHospThriftyTreasures copy_thumb


What's It Wednesday at Ivy And Elephants
Ivy and Elephants
Related Posts Plugin for WordPress, Blogger...