
After working on this cabinet for about 2 weeks, then waiting for hardware that was back ordered, I can finally say I'm finished with this project.
 |
I wasn't sure if I should paint it or not. Then, when I did decide to paint it, the color combinations were endless. |
 |
Also, there were no castors. What you can't see is how dirty it was and it was really stinky. |
 |
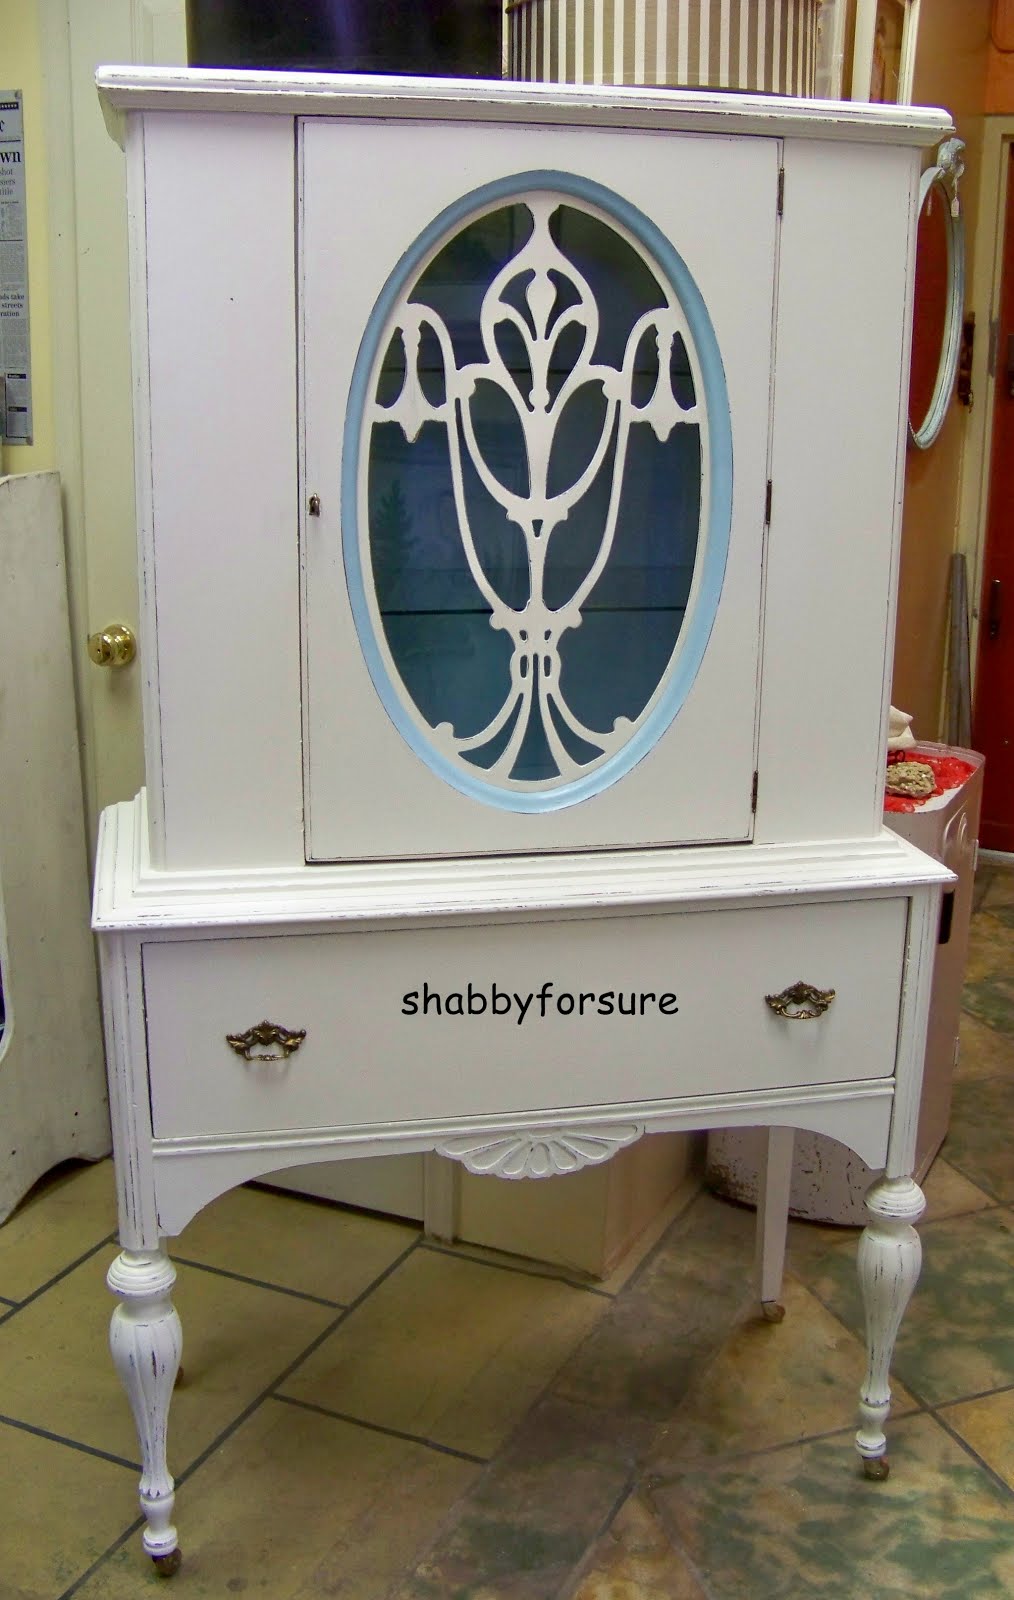
I removed the back so I could work on the inside more easily. The two wooden shelves were alright but I decided to add glass shelves at a cost of about $36.00. Also, I did away with the pediment, which was not original to the piece. |
 |
I mixed some blue "oops" latex paint with Kilz 2, then added a handful of Plaster of Paris. I got some of the mixture on my skin and could not wash it off with soap and water. |
 |
Then I waxed it using SC Johnson Paste Wax. |
 |
I love how the blue primer peeps through. |
 |
|
 |
 |
|
 |
Very dirty, very stinky. |
 |
Not only does it make it beautiful, it makes it a lot cleaner and improves the smell. And I'm glad I sprung for the glass shelves. |
 |
Then I went to Lowe's and bought a cabinet light that cost around $10.00. |
 |
Now I can move it easily. Before, it was heavy and awkward and it took two people. |
 |
The pop of color on the inside of the cabinet and drawer is Bird song Blue. I also painted all the hardware with Rub 'n Buff Grecian Gold, purchased at Michaels. |
 |
I couldn't be happier with the results. |
What a wonderful project-the transformation is amazing!
ReplyDeleteHi, Thanks for the nice comments. Have a good day...Connie
DeleteAll your hard work on this cabinet has certainly proved it's worth. The finished piece looks amazing. I hope my piece I want to paint looks even half as good as yours I'll be pleased. I want to use Chalk paint but living in rural France I haven't found a stockist near enough to where I live. So I'm still undecided on what paint to use. Maybe if I used an eggshell finish & rubbed it down a little then waxed it ? Do you have any suggestions that would give a chalk paint effect.
ReplyDeleteHi Barbara, Thank you for your kind words. If you don't have access to Chalk paint it is real easy to make your own. You could start by mixing 1 cup of your favorite latex paint with about 2 or 3 tbsp of Plaster of Paris and stir it up real good. Stir long enough to get rid of the lumps. If it gets too thick add a little bit of water. Try it on an experimental piece to see if it works for you. (In the good old days Plaster of Paris was used by doctors to make casts for broken bones. When mixed with paint/water it hardens nicely.) Have a good day, Connie
Deleteit has a churchychic to it, yes?
ReplyDeletehope you'll stop over soon--we'd love to have you.
michele
Hi, Yes, it does have that quality. Thanks for stopping by...Connie
DeleteConnie,
ReplyDeleteI saw your problem on Debra's Common Ground blog and have had the same problem. This is what I have been doing to fix the uploading of pictures. I browse and upload in the html and then click on compose and the pictures go into a regular picture that you can see and adjust for size etc. I compose my text first and then hit html to browse the pictures I want then upload and hit back to compose and they are all like you are use to doing in compose mode. I hope that makes sense. This blog world is hard enough and then I never know if it is me or the computer or blogger when this stuff happens!!!!! Hope this helps.
Kris
Hi Kris, Yes, that makes sense. That's how I did my last post. Also, someone suggested I not use Internet Explorer but instead use Chrome. I downloaded Chrome and signed in using Chrome and things worked fine. But, I think I will stick to the way you suggested. It worked okay for me. Thanks for your help...Connie
DeleteBeautiful!! I am planning on trying something like this on my bedroom furniture come the Spring...
ReplyDeleteHugs,
Debbie
Thanks Debbie, Good luck on your project...Connie
DeleteWow --what a great piece! You did a wonderful job with this :)
ReplyDeleteHi Sandy, Thanks for stopping by and leaving a comment. Have a good day...Connie
DeleteWhen I first saw this, I wondered how in the world you painted the fretwork so neatly and then I saw it was taken off. You should be so so proud of this! It's just beautiful. Love the blue background and the light inside. FABULOUS!
ReplyDeleteHi Lynn, Thanks for stopping by and taking the time to leave a comment. Have a good day...Connie
DeleteHi Connie! Glad I stopped over for a visit. This piece is gorgeous! Beautiful work.
ReplyDeleteHi Nicki, Thanks for stopping by and taking the time to leave a comment. Have a good day...Connie
DeleteIt looks sensational Connie. Thank you for linking up at Shabbilicious Friday.
ReplyDeleteHi Kerryanne, Thank you. It's always a pleasure to join your parties...Connie
DeleteGreat article! Thanks for sharing and more power to you!
ReplyDeleteHi, Thanks for stopping by and leaving a comment...Connie
DeleteWow Connie, this piece is amazing! Love the colors and that fretwork is gorgeous. Great that hubby was able to repair it. Happy to be following you. I have a link party, Share Your Cup Thursday. I would love if you shared some time!
ReplyDeletehugs,
Jann
Hi Jann, Thanks for the comment and following. Yes, I will be happy to come see you soon...Connie
DeleteWhat new Life you have breathed into this Beautifully crafted piece! I Love a good makeover story with a happy ending... Bravo! And Thanks for Sharing the 'Process' of how to do a good makeover right.
ReplyDeleteDawn... The Bohemian
Hi Dawn, Thanks for stopping by and taking the time to leave a comment...Connie
Delete